Welcome to MOE, the all-in-one, cloud based solution for customer management, scheduling and bookkeeping. Use the quick start guide or explore each feature in detail to learn how to leave behind the old paper books and multiple software solutions.
Quick Start
Guided by animated gifs, create your first client, service, product, appointment, out of office, transaction and report.
Creating a client

Creating a service

Creating a product
Creating an appointment

Create an out of office
Creating a transaction
Viewing reports
Schedule
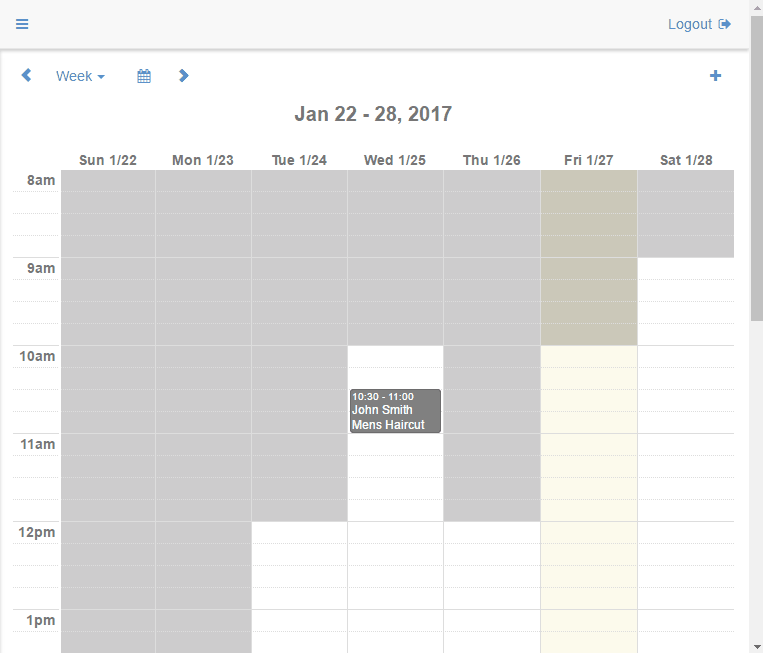
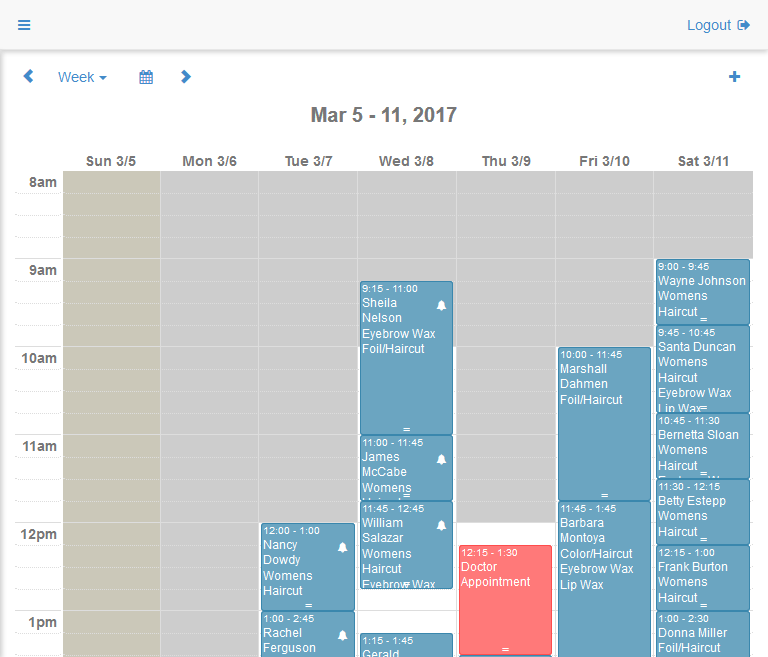
MOE provides a customizable calendar to manage client appointments and schedule out of office times.
Overview
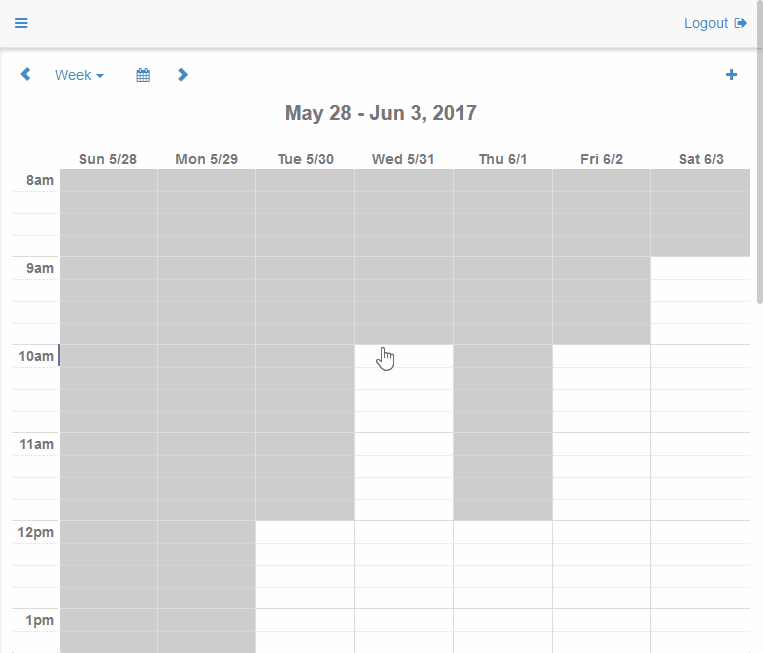
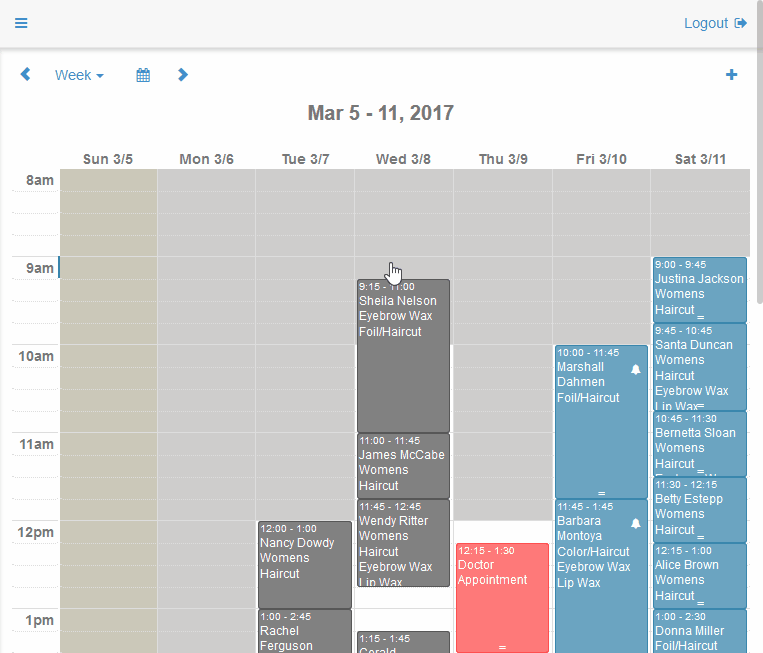
MOE's calendar displays your appointments and out of office reminders for the day, week or month. The calendar shows a customizable range of hours, divided into 15 minute segments. Customizable working office hours are shown in white and non-working hours are shown in light gray. Appointments show the time of the appointment, as well as the client and services booked for the appointment. Appointments can be marked as confirmed or needing extra-care for added usability. Appointments that have been checked-out (invoice or transaction) are displayed in a different color. Use the calendars out of office feature to book times you will be away from the office.
Adding/Modifying entries
To add an appointment or out of office, click the + button, click the desired time on the calendar or click and drag the desired time slot on the calendar. After selecting the time, select Add Appointment or Add Out of Office from the dialog box. On the next dialog box, fill in the desired information and select save. In the appointment dialog box, selecting services will automatically set the appointment length to the time allocated to the services.
Calendar entries can be modified or deleted by clicking on the appointment or out of office entry. Entries can also be rescheduled by dragging and dropping and the duration can be changed by clicking and dragging the handle at the bottom of the entry.
Setting Appointment Properties
Appointments have additional properties that can be set from the calendar page. Extra care and confirmed options can be set by clicking on the appointment and selecting the desired property. Extra care appointments are displayed with a different text color and confirmed appointments are displayed with a different background color.
MOE's reminder feature lets you send and track appointment reminders. Appointments that have a reminder sent are shown with a bell icon in the upper right corner of the appointment. To send a reminder, click on the appointment and select Send Reminder. A dialog box will be displayed with a reminder message built using the reminder template set on the settings page. If the client of the appointment has a reminder method set, a button will be enabled allowing you to send an email or text or place a call to the reminder number specified. Use the copy to clipboard button to copy the reminder text and paste into the message/email application of your choice. To clear a reminder from an appointment, click on the appointment and select Clear Reminder.
Changing the view
To change the calendar view select the desired view (day, week or month) from the dropdown next to the calendar icon in the top left corner of the schedule page.
Changing the date
To jump to a specific date, select the calendar icon in the top left corner and choose the date desired.
Use the left and right arrows at the top left corner of the schedule page to move forward or backward by one day/week/month.
Keyboard shortcuts are also available. Use the left and right arrow keys to move forward or backward by one day/week/month. Use the numeric keys to jump forward by the corresponding number of days/weeks/months. For example, pressing the eight key while in week view mode will move the calendar view forward by 8 weeks.
Customizing
To customize the calendar display, navigate to the settings page.
The In Office Hours section controls the working hours displayed on the calendar. Check the box and select open and closing times to configure the working hours for your bussines.
The Calendar Hours section controls start and stop times displayed on the left of the calendar page.
The Calendar Colors section allows for setting the background and text colors used to display appointments and out of office reminders.
Clients
Manage all of your clients' information with MOE's client page.
Creating a client
To create a client, click the + button on the clients page. Enter the client information and click Save.
Modifying client information
To modify an existing client's information, click on the client in the clients page and select edit client information. Once the desired changes are made, select save.
Viewing client appointments
To view a client's open appointments, click on the client and then select open appointments. All the client's open appointments will be displayed. Click on an appointment to open the calendar page for the date of the appointment.
Viewing client transactions
To view a client's past transations, click on the client and then select past transactions. A summary of the client's past transactions will be displayed. Click on a transaction to edit in the checkout page.
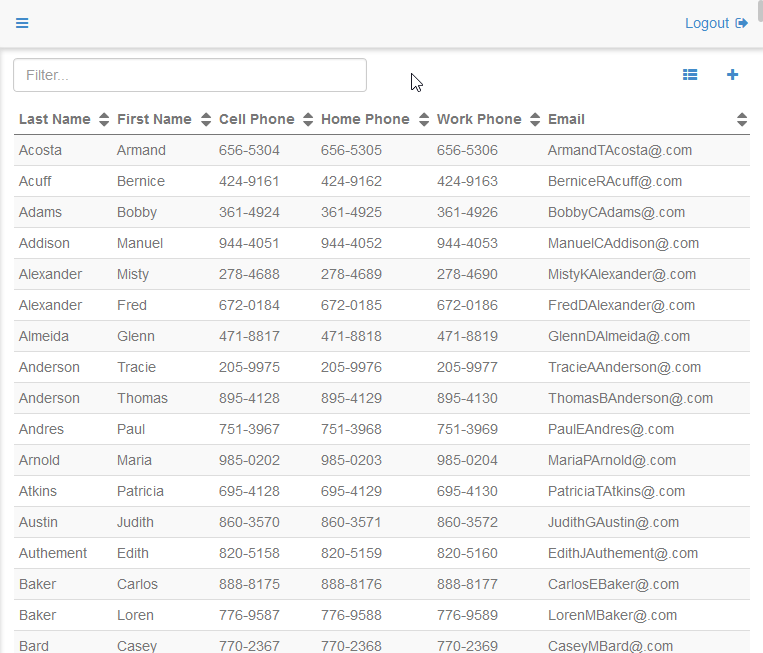
Filtering/sorting clients
The client list can be displayed as a table or cards. To toggle between the view types, click the icon to the left of the + button.
The filter text box of the clients page allows you to search/filter for clients based on home phone, cell phone, work phone, email and name. Note, the filter function removes non-numeric characters from phone numbers. To filter based on phone number enter numbers only. For example, enter 6565305 instead of 656-5305.
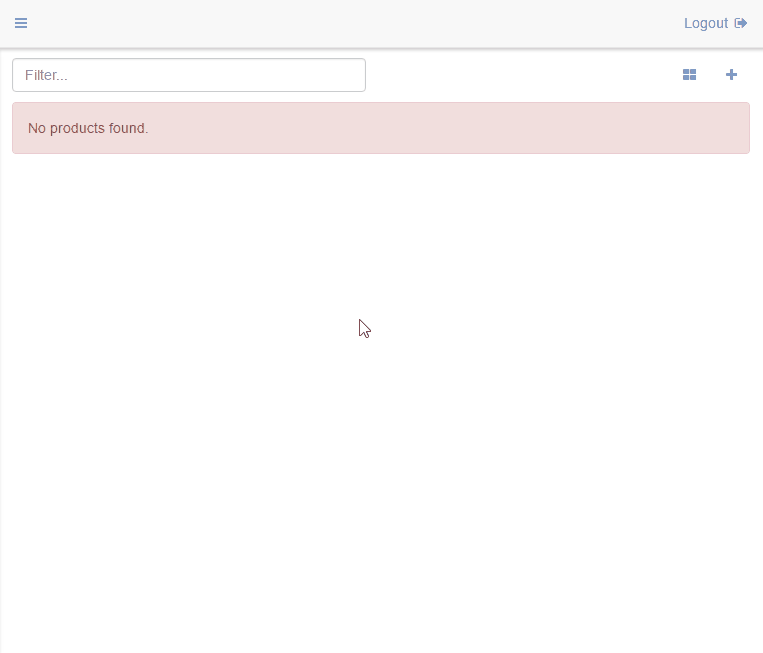
Products & Services
Use MOE's products page to manage your inventory of goods for sale. Use the services page to set service information used for booking appointments.
Creating a product/service
To create a new product or service, click the + button on the respective page. Enter the product/service information and click save.
Modifying product/service information
To modify an existing product or service, click on the product/service in the respective page. Once the desired changes are made, select save.
Managing product inventory
Each product in the product list has an associated quantity in-stock. When a product(s) is sold using the checkout page, the quantity sold is deducted from the in-stock quantity. When new stock is purchased, simply update the in-stock quantity using the product edit interface.
Filtering/sorting products & services
The product/service list can be displayed as a table or cards. To toggle between the view types, click the icon to the left of the + button.
The filter text box of the products page allows you to search/filter for products based on product name and wholesaler.
The filter text box of the services page allows you to search/filter for services based on service name.
Checkout
Products and services sold and marked as paid are managed as transactions. Invoices are used to bill for products and services sold but not paid. The checkout page is used to create both transactions and invoices.
Creating a transaction
To create a transaction at least one client must be added with at least one product or service. To add a client, select the client from the add client dropdown list, then select the appointment to add or add without an appointment. Adding an appointment automatically adds the services listed for the appointment. Multiple clients and appointments may be added to a transaction.
Add services or products to a client by selecting the item from the Add Service or Add Product dropdown list beneath the client. Item prices can be adjusted by clicking on the price. Remove items by click the blue X next to the price. Remove a client by removing all items from their list or clicking the red remove button.
Record the amount paid for the transaction in the proper payment form field. Note, the paid fields should not include tip. Enter tip amounts in the designated tip fields. After entering the transaction details, click save to record the transaction. Past transactions may be viewed on the transactions page.
Creating an invoice
To create an invoice follow the same steps listed above for creating a transaction. Before saving, click the checkbox next to Invoice. Open invoices may be viewed on the invoices page.
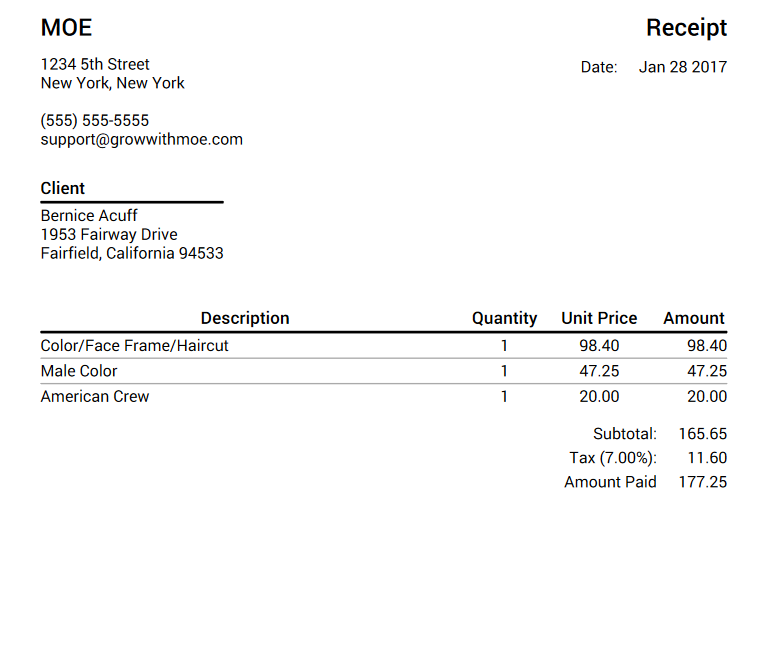
Creating PDF receipts/invoices
After saving an invoice or transaction, click the generate receipt or generate invoice link in the green notification box. A PDF file with the transaction/invoice information will be generated. Note, Safari users must enable pop-ups for this feature to work. Use the setting page to change the business name and contact information found on reciepts and invoices.
Editing a transaction/invoice
To edit a transaction, click on the appointment for the transaction or click on the transaction in the transactions page and select edit transaction. The checkout page will populate with the transaction data. Modify as needed and click save to record the new transaction information.
To edit an invoice, click on the invoice in the open invoices page and select edit invoice. The checkout page will populate with the invoice data. Modify as needed and click save to record the new invoice information.
Changing the tax rate
To change the tax rate for an individual transaction or invoice, click on the edit icon next to the tax display.
Change the default tax rate for all transactions and invoices on the settings page.
Transactions
Use MOE's transactions page to view all transactions for a specified time frame. Select a start date, end date and press refresh to view all transactions created within the date range provided.
Click on a transaction to edit or generate a receipt.
Open Invoices
MOE's open invoices page displays all invoices that have not been marked as paid (transaction created).
Click on an invoice to edit, checkout or create a PDF invoice.
Use the filter box to filter based on client, invoice date, due date or invoice number.
Use the table view mode to sort invoices based on client name, invoice date, due date or invoice number. Click the icon at the top right corner of the open invoices page to change the view mode between table and cards.
Expenses
Use MOE's expenses page to view, edit or create expense records.
To view existing expense records select a start date, end date and press refresh to view all expenses with a date within the date range provided. Click on an expnse to edit.
To add a new expense, click the + button in the top right corner of the page. Enter in the expense information and click save. The categories text box will auto-complete with expense categories used in past expenses.
Reports
Use MOE's report page to analyze revenue flow with real time sales, expense and sales tax data. Select a start date, end date and press refresh to instantly create summary graphs and tables of sales and expenses.
Detailed report tables for clients, products and services are displayed after the summary information.
Account
Use the account page to change your password, view your subscription status and purchase additional subscription time.
The account page also lists your personal MOE referral code. Get one month free for every referral that uses your referral code in the promo code field of a subscription purchase.